- Details
- Written by: Jorge Rosa
- Category: IoT/SOC
- Hits: 6153
I've been working with Nano PI for some time now and continue to find a pretty awesome System On Chip (SOC) with fair performance. I started with the NanoPI R4S on which I created a number of solutions, like a router, a gateway, a VPN server, Git Server and File server. For the moment, it serves as a file server in my network.
Nano PI products are supplied by FriendlyElec. They are the company that develops and maintains these SOCs. They actively update information and documentation for each product on their Wiki site. The information they provide is quite comprehensive and useful, and has been a good help. They have based their operating system on some mature GNU/Linux distributions such as OpenWRT and Debian based (FriendlyCore). Armbian also an option, and you can find a GNU/Linux distribution with support on their site.
The schematics of each Nano PI are publicly available on their wiki page.
A few moths ago I came across a new product, the NanoPI R5S (and Wiki). From my search at that time, there were already some reviews of this product from Stupid Projects and CNX Software. Their reviews aroused my curiosity and some other ideas, especially because of some intrinsic characteristics of it, namely:
- CPU: Rockchip RK3568B2, Quad-core ARM Cortex-A55
- RAM: 4GB LPDDR4X
- Flash: 16GB eMMC 5.1 Flash
- Ethernet: 1x Native RTL8211F-CG chip Gigabit Ethernet, and 2x PCIe RTL8125BG chip 2.5G Ethernet
- PCIe: M.2 M-Key, PCIe2.0 x1, support NVME, PCIe WiFi etc <= This is the most interesting part!!!
Two of the first things I took into account were; (1) the CPU performance was described as one of the best in their range and, (2) it was the first product at the time to have two additional network interfaces at 2.5Gbit. While I find these features very interesting, they wouldn't be enough to make me lose my mind...
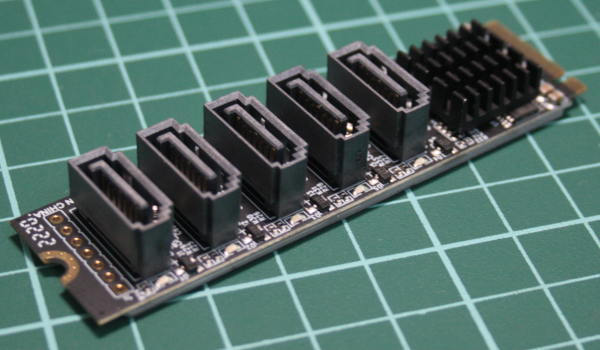
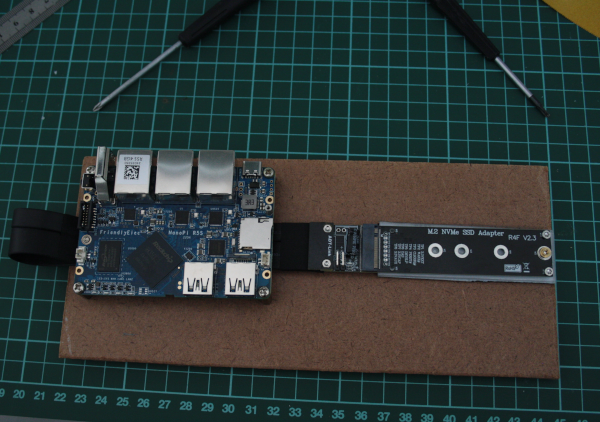
What really caught my eye was the M2 PCIex interface. Mainly because, until now, I have always built and used file servers on low-profile small computer systems with support for external USB drives as I do have now, but never had the opportunity to have one with internal storage, in this case with support for an M2-M key for NVME discs. Usually these SOCs are too expensive to acquire, which is not the case here. After some searching I found someone (I lost the link and do not remember the site) who suggested to use a JMicro JMB585 M2-Key interface to 5x SATA instead of an NVME disk to support up to 5 internal SATA disks.
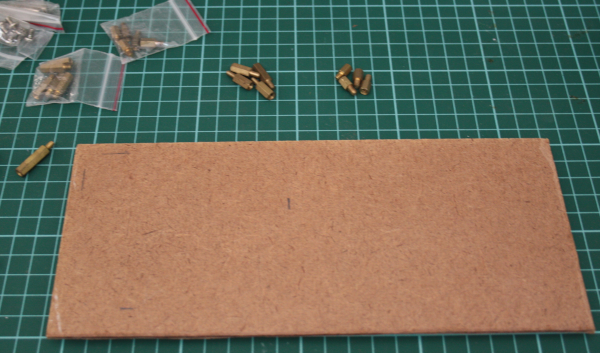
My curiosity got the better of me and led me to validate the practical application of such a solution. If I'm going to do these tests, I'll also have to get an expansion card for the test board to be built, it's not a good idea to have the components not fixed to the bench or in something solid and stable.
In case of success and good expectations, I might think about upgrading my actual network storage.
So I have bought the following products:
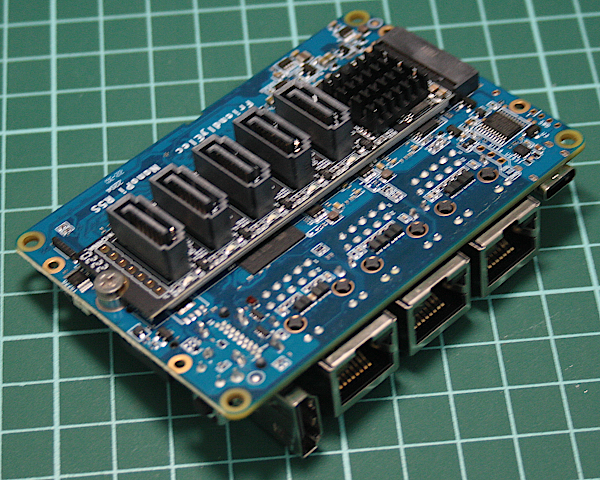
- two Nano Pi R5S (yes, I lost my mind!) from FriendlyElec. One with Metal Case and another Bare board, both with 4GB MEM/16GB eMMC. Their after sales support is very good and they were quick to help me resolve a problem with customs.
- the M2-Key M SATA Interface from Banggood
- an extension card with a ribon of 25cm from AliExpress
Delivery of these products took between 2 and 5 weeks as they were obviously coming from China. It was worth the wait and the components arrived without any problems.


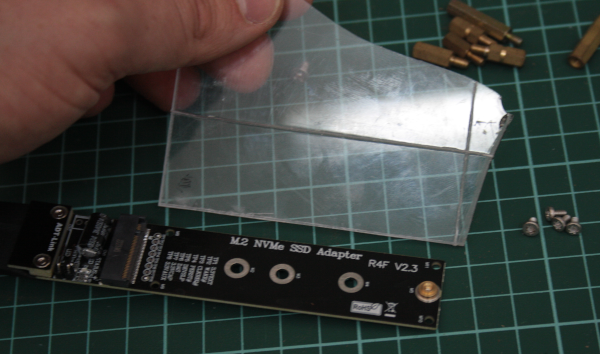
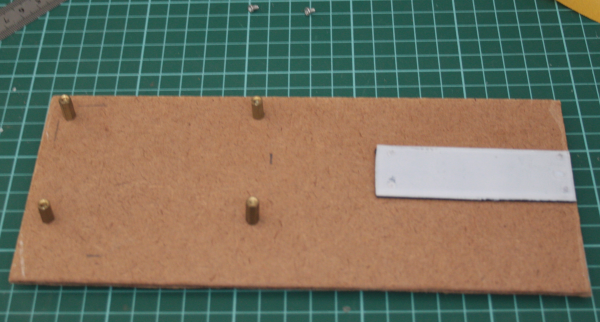
These components needed to be secured so that I could connect USB and/or Ethernet cables in a safe and practical way. So I came up with the idea of building a development base board using a small piece of pressed wood, bolts, screws and some leftover acrylic.
With this development baseboard implemented and the components secured, I started to install the O.S. on the Nano PI R5S. I followed the instructions to install the OS to the eMMC memory from Wiki page [2] section 4.5.2.2 (Option 2: Install OS via TF card). Instead of using Win32DiskImager to burn the SHDC card, I used the Balena Etcher software with the image from Google Drive:
[Google Drive]:\RK3568-FriendlyElec\01_Official Images\02_SD-to-eMMC images\rk3568-eflasher-friendlycore-focal-5.10-arm64-20230314.img.gz
After installing the OS on the eMMC, the eth0 network adapter was changed to suit my network with the IP 192.168.1.9 and the basic tests of this solution were initiated. One of these tests was to check the SATA interface with a SATA disc attached
| root@FriendlyElec:~# ip addr 1: lo: <LOOPBACK,UP,LOWER_UP> mtu 65536 qdisc noqueue state UNKNOWN group default qlen 1000 link/loopback 00:00:00:00:00:00 brd 00:00:00:00:00:00 inet 127.0.0.1/8 scope host lo valid_lft forever preferred_lft forever inet6 ::1/128 scope host valid_lft forever preferred_lft forever 2: eth0: <BROADCAST,MULTICAST,UP,LOWER_UP> mtu 1500 qdisc mq state UP group default qlen 1000 link/ether be:70:4c:b9:ce:25 brd ff:ff:ff:ff:ff:ff inet 192.168.1.9/24 brd 192.168.1.255 scope global eth0 valid_lft forever preferred_lft forever inet6 2001:818:df61:6900:bc70:4cff:feb9:ce25/64 scope global dynamic mngtmpaddr valid_lft 86400sec preferred_lft 3600sec inet6 fe80::bc70:4cff:feb9:ce25/64 scope link valid_lft forever preferred_lft forever 3: eth1: <NO-CARRIER,BROADCAST,MULTICAST,UP> mtu 1500 qdisc mq state DOWN group default qlen 1000 link/ether c2:70:4c:b9:ce:25 brd ff:ff:ff:ff:ff:ff 4: eth2: <NO-CARRIER,BROADCAST,MULTICAST,UP> mtu 1500 qdisc mq state DOWN group default qlen 1000 link/ether 2e:8c:5b:81:5a:63 brd ff:ff:ff:ff:ff:ff root@FriendlyElec:~# lspci 0000:00:00.0 PCI bridge: Fuzhou Rockchip Electronics Co., Ltd Device 3566 (rev 01) 0000:01:00.0 Ethernet controller: Realtek Semiconductor Co., Ltd. Device 8125 (rev 05) 0001:10:00.0 PCI bridge: Fuzhou Rockchip Electronics Co., Ltd Device 3566 (rev 01) 0001:11:00.0 Ethernet controller: Realtek Semiconductor Co., Ltd. Device 8125 (rev 05) 0002:20:00.0 PCI bridge: Fuzhou Rockchip Electronics Co., Ltd Device 3566 (rev 01) 0002:21:00.0 SATA controller: JMicron Technology Corp. Device 0585 |
After this test I had to try to use a disk drive. So I picked up a 500GB SATA disk form a broken laptop and connected it to the SATA Interface. I had to move this solution near to the ATX power suply of my bench :P in order to have power for the disk :P.

|
root@FriendlyElec:~# fdisk -l ( … a list of several /dev/ramxx disks and the eMMC storage /dev/mmcblk2 … ) Disk /dev/sda: 465.8 GiB, 500107862016 bytes, 976773168 sectors Device Boot Start End Sectors Size Id Type |
At least the disc is visible to the OS. Now I deleted this volume and created an EXT4 one. Finally, I proceeded with the formatting.
|
root@FriendlyElec:~# fdisk /dev/sda Welcome to fdisk (util-linux 2.33.1).
( … applied the proper commands to delete the old partition an create a new one … ) Command (m for help): p Device Boot Start End Sectors Size Id Type Command (m for help): w1 Allocating group tables: done root@FriendlyElec:~# ls /dev/disk/by-uuid/ -la |
Well, I managed to set up a dumb and simple samba server with the raw base security to see how easy and simple it can be set up and how fast files can be transferred. First I had to update the Software Package Manager and install the Samba software, as it is not included in the distribution image.
|
root@FriendlyElec:~# apt update ldconfig: file /usr/lib/aarch64-linux-gnu/libmali.so is truncated ldconfig: file /usr/lib/aarch64-linux-gnu/libmali.so.1 is truncated ldconfig: file /usr/lib/aarch64-linux-gnu/libmali.so.1.9.0 is truncated |
Now that I had the Samba software installed, I needed to configure a disk mount point and present it to the network. The directory /mnt/500G_test1 was created for this purpose and the disk /dev/sda1 was mounted to it. I won't be using the sdaxx device directly, I'll be using its UUID instead, so that if the disk is connected to any other SATA interface, the UUID will be redirected to the correct sdaxx. So the following line was added to the fstab file:
|
UUID=cc318e3b /mnt/500G_test1 ext4 defaults 0 0 |
The group SambaUsers and the user Sambista have been created and assigned accordingly:
|
root@FriendlyElec:~# groupadd SambaUsers |
Next, I mounted the volume and assigned the correct permissions:
|
root@FriendlyElec:~# mount /mnt/500G_test1/ |
Before enabling the Samba server, I added the following lines into the smb.conf file:
|
[500G_test1] |
Finally, I was able to activate the Samba server:
|
root@FriendlyElec:/mnt# systemctl start smbd nmbd o nmbd.service - Samba NMB Daemon Tasks: 1 (limit: 4654) |
Now that the \\192.168.1.9\500G_test1 share is available and visible on the network, I’m ready to make the data transfer test. No matter which network card I use from the Nano PI R5S under my network, the maximum data transfer is 1GBit due to the 24Port HP Procurve 2724 Gbit switch on my office private segment. So my expectation is to have a limit of 110MB of data network transfer.
This test is quite simple, I have identified a Windows Folder in my desktop computer with several files where its volume was about of 31GBytes and managed to copy this Folder to the Nano PI R5S Shared Disk. The results are shown in the pictures below:
![]()
This basic test alone has made my day. The data transfer ranged from 65MBytes to 96MBytes and finished in 7min and 12seconds. Not bad at all if the purpose is for a small NAS system.
For comparison, my current Network data storage (with Samba) has a slower data transfer, about 33MBytes at its top speed. So this last test shows a better speed, much higher than what I’ve got now. I should bear in mind that my current Network Storage has been working productively for almost 11years and the network shares are actually external USB disk drives. So there is certainly a bottlenecks somewhere, even if it is due to technological limitations.
It is, also, clear that the Nano PI R5S solution outperforms my current Network Storage in terms of speed. In terms of overall performance, I have avoided drawing any further conclusions. Mainly because I still need to develop this solution to the same extent as I have developed my current Network storage in terms of expandability, stability and security.
I have been thinking about the number of solutions that can be applied to the NanoPI R5S as well as possibly being my next network storage solution. I'll continue to evaluate this SOC with the SATA interfaces and additional SATA disks over the next few months and give you a follow up as soon as I can.
One thing is for sure, I have to give this solution an housing to keep it protected and ready to go. Mainly because I’m always inventing new things and the bench space is always needed ...
See you soon!